From a piece my friend Naveen wrote a while back called Wearables versus there-ables:
What if we didn’t have to / weren’t meant to carry our technology with us as we moved around town?
What if the technology was actually already in the room when we got there?
As he points out, a lot of tools that used to be separate have now converged into one: the phone. You might not buy another camera again, and you probably won’t buy a calculator. For the most part, it’s a good trade-off: what we lose in the tactile pleasures of a good single-purpose device, we gain back tenfold in having all those devices in our pocket all the time.
That’s all fine for calculators, cameras, music players, and the like — things that are there when we need to use them, and can forget about when we don’t. But our phones are also the nexus of all kinds of data we want pushed to us — news, messages, notifications, alerts, status updates. Things we want to know about without going looking for them.
A phone isn’t actually great for this kind of ambient awareness. It’s usually in a pocket or purse, so the ways it can get our attention are limited: a buzz, a notification on the lock screen, a red dot on an app icon. I can choose to let myself be interrupted, or I can compulsively check in to see what the latest alerts might be.
I’ve found myself wanting a less intrusive channel for ambient data. Something I can glance at in passing, without giving my full attention or opening myself up to whatever other interruptions my phone might have in store. It should be easy to check, but just as easy to ignore.
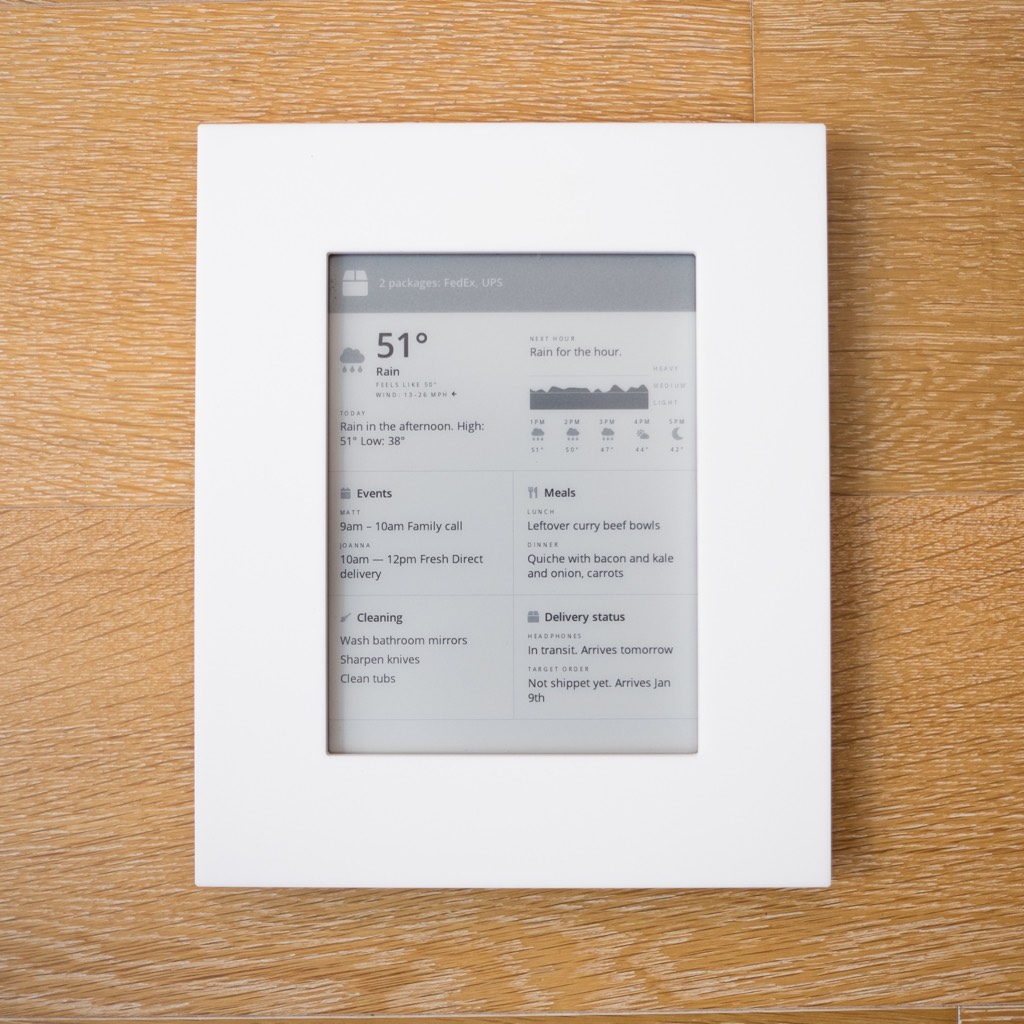
This is the device I landed on: a wifi-connected Kindle 4, mounted on the wall in a simple laser-cut acrylic frame. Once a minute, it loads a screenshot of a web page I built that shows a few different kinds of data I want easy access to: calendar events, weather, the status of packages I’ve ordered, etc.
I experimented a lot before landing on this setup. I’m very happy with the result, and even more happy with how easy it is to put together. A used Kindle is the only hardware required, and you can pick up a serviceable one from eBay or BackMarket for $30 or less.
The setup process has a few steps, but if you’ve used a command line before, you can totally do it.
But first, some explanation:
I don’t care, just skip to the instructions
Why e-ink?
For me, an e-ink screen is the most important part of this device. E-ink has some limitations (it’s black and white, it’s slow to refresh), but for my purposes here those are fine. The beauty of e-ink is its ability to fade into the background. It doesn’t give off light like a backlit screen would. When the light in the room is dim, it doesn’t call attention to itself.
An e-ink display feels more like a poster on your wall than a computer. When you don’t need to look at it, you can forget it’s there, unlike a backlit screen.
Why a Kindle?
This device needs a few things: a good-sized e-ink screen, a processor to put stuff on that screen, and a wi-fi connection. A jailbroken Kindle (more on what jailbreaking is later) is perfect for the job: it packs all of these things into an impressively small package, and it’s super cheap. You could build something similar with e.g. a Raspberry Pi and a standalone e-ink screen, but the parts would cost at least $150, and the final product would be much bulkier.
Why a screenshot of a web page?
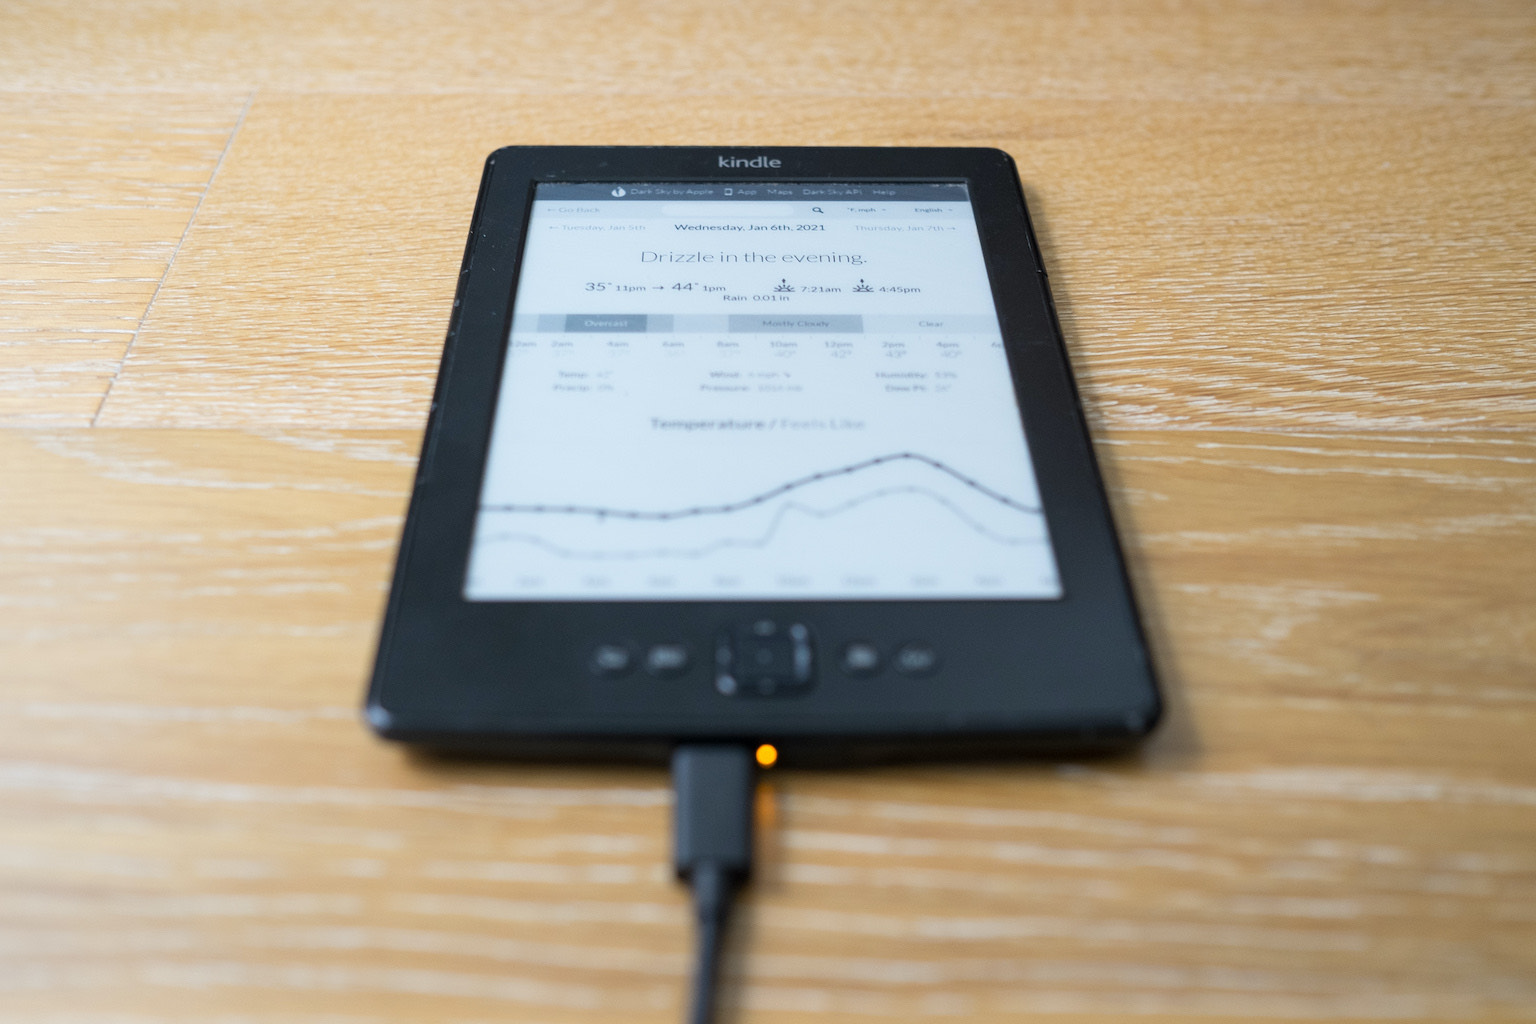
The Kindle is actually a pretty capable little computer. It runs a Linux-based OS, and once it’s jailbroken, you can access a command line and do lots of things you could do in Linux anywhere else. In previous iterations of this project, I had a lot of code running on the Kindle itself, fetching data and drawing stuff to the screen. There are limitations though, and also updating the code on the device is kind of a pain in the butt.
The nice thing about having it just display a web page is I can easily make updates without having to mess with the Kindle itself. Also, it’s way easier to make a flexible layout in HTML and CSS than when you’re drawing things on the screen manually.
The Kindle actually has a built-in web browser, which would ALMOST be enough on its own. You could just build a web page, point the browser to it, and stick it up on the wall. There are three problems:
- Left to its own devices, the Kindle will go to sleep after a while, and show its screensaver.
- If you want to be able to update the data on the screen, the page needs to automatically reload itself.
- The Kindle browser has some unsightly elements (the header and URL bar) that can’t be hidden. Not the worst, but not as pretty as I’d like.
My solution was to run a server that takes a screenshot of a webpage (easier than it sounds), and have the Kindle download that screenshot once a minute.
There are services that will take screenshots of a website for you, but they tend to charge per screenshot, which gets pretty pricey (I like to just have the Kindle refresh once a minute, which means more than 40,000 times per month). Instead, I wrote my own little server that uses Puppeteer to take screenshots and ImageMagick to convert them. It’s open source, and you can run it yourself on Heroku for free. One-click installation instructions below.
Build your own
If you’re even a little bit familiar with using a command line, you can make your own. I’ll focus on how to get a screenshot of a web page displaying on the Kindle. The display I built for myself shows a few different kinds of data I like having easy access to, each of which warrants its own blog post. You can get started with something simple, like your favorite weather or news site.
The only fiddly part is setting up the Kindle itself, which is why we’ll make sure you only have to do it once.
-
Get a Kindle
I’ve mostly used the 4th generation (non-touchscreen) Kindle, because it gets the job done and can be found pretty cheap on eBay. You can also check BackMarket, where the stock varies a bit but I’ve often seen 4th-gen Kindles for around $30.
-
Set up the image server
You can use my script to do this — the source for it is here if you’d like to host it somewhere yourself, but the easiest option is to create a free Heroku account and then click this button to deploy it:

You’ll be prompted to name your project (call it whatever you want), and to enter the URL of the page you want to display on your Kindle. You can change that URL later by opening your Heroku project and going to Settings > Config Vars.
Once you’re done deploying, take note of the server’s URL. If you used Heroku, it’ll be something like
https://the-name-you-picked.herokuapp.com/ -
Connect your Kindle to Wi-fi
Press the Menu button (☰), then choose “View” next to “Wi-fi Networks”. Select your home network, and enter the password if there is one.
-
Jailbreak your Kindle
We need to be able to run custom software on the Kindle, which you can’t do out of the box, so we’ll need to “jailbreak” it. This is where it might start to sound daunting, but it’s not actually very hard — in part because there’s a very devoted community of nerds who have figured out how to do it for every Kindle model, and fastidiously maintain instructions with no promise of reward or recognition. You gotta love the internet sometimes.
This wiki page has a lot of Kindle-hacking information, but all we care about is the Jailbreak section. It links to two different forum posts, which are where the jailbreak info is kept up to date. There’s one for older Kindles (Kindle 2, DX, DXG, Kindle 3, and Kindle 4), and one for more modern Kindles — make sure you get the right one. The instructions in the forum post change from time to time, but you’re looking to download the zip file with “jailbreak” in the name that’s the one for your Kindle model.
You’ll follow the included instructions, but the TL;DR version is that you open the zip file, plug your Kindle in via USB, copy files over, and then restart it.
-
Install USBNetwork
Once the Kindle is jailbroken, we’ll need one more thing in order to access it via command line: USBNetwork. You’ll find it in the same forum post where you found the Jailbreak download link. The process for installing is slightly different here — read the instructions, but what you’ll need to do is plug the Kindle in, copy the
.binfile over, and then launch it by going to [Menu] -> Settings -> [Menu] -> Update Your Kindle. -
Add the script to download images
Next up is to access the Kindle via the command line so we can set up our script to download images. First, we need to enable USBNetwork to allow command-line access via USB:
- Disconnect your Kindle from your computer
- Press the keyboard button on the Kindle, and type
;debugOn(make sure to get the semicolon at the beginning), and then enter (↵) to enable debug mode. - Press the keyboard button again, and type
~usbNetworkand hit enter (↵). It may pause for a second. Once it’s done, press keyboard, type;debugOffand hit enter. - Reconnect your Kindle to your computer via USB.
From a command line on your computer (i.e. in the Terminal app on a Mac):
-
Type
ssh [email protected]and hit enter. -
You’ll be prompted for a password. The default password is
mario. -
You’re in! One more thing before we can do anything: by default, the Kindle’s drive is mounted in read-only mode. To make it writeable, type
mntroot rwand hit enter. -
Create the image-downloading script:
nano /mnt/us/script.shThis will create an empty file for your script and open it for editing. In the editor, type the following, substituting in the URL to download your image (from step 2 above):
curl Insert_your_URL_from_step_2_here -o status.png
eips -c
eips -c
eips -g status.png
To save and exit the editor, type
control-O, enter, and thencontrol-X.The first line there downloads your image and saves it to a file called “status.png”.
eipsis a program that comes with the Kindle for drawing to the screen. The first twoeipscommands clear the screen (twice for good measure - especially on older devices there can be some ghosting). The last line displays our image.You can now test the script by running it like this
./script.sh. You should see the Kindle screen clear, and then a moment later your image will appear.
-
Set up a cron job
We’ll want the Kindle to automatically download the image and display it every minute. The Kindle’s OS, like other Linux-based operating systems, comes with
cron, a tool for running tasks on a schedule. To use it, we just need to edit its configuration file:nano /etc/crontab/rootAdd this line to the bottom:
* * * * * /mnt/us/script.shAgain, to save and exit type ⌃O, enter, then ⌃X.
Finally, restart cron:
/etc/init.d/cron restart
If everything worked, you should see the image refresh on your Kindle screen every minute. You’re done! You can now unplug the Kindle from your computer.
FAQ
Do I have to keep it plugged in?
You may be thinking, “Kindles have famously long battery life. Can I run this without having to plug it in?” The short answer is, not really. In previous iterations of this project I tried hard to make it work. The main challenge is that in order to keep the screen refreshing, we can’t let the Kindle go to sleep — you might get weeks of battery life from a Kindle you use for reading, but it’s because most of that time it’s hibernating. Power consumption is very low when it’s awake and the screen isn’t changing, but it’s not nothing. With a lot of effort (refreshing only once a day, and turning off the wi-fi radio when I wasn’t actively using it), I was able to get the battery life up to about a week. Refreshing only once a day is okay for some purposes, but for data that needs to be fresh it’s not really good enough. Also, having to take the Kindle down to recharge it even once a week got to be pretty annoying.
What do I need if I don’t want to host the image server on Heroku?
You can host the Express server that creates the images on any node server. It uses Puppeteer to control a headless instance of Chrome to get the screenshot, so the one requirement is that the host be able to run the Chrome binary that Puppeteer installs.
What’s the frame you have it in?
It’s a piece of laser-cut acrylic. I unfortunately don’t have the template I made anymore, but I just measured the inner screen size of the Kindle, drew a rectangle that size in Illustrator, and then another rectangle an inch and a half bigger. I don’t have a laser cutter, so I had it made at a shop - if you happen to be in NYC, check out Canal Plastics. To attach the Kindle to the frame, I just used masking tape. Because the Kindle’s so low profile, you don’t see it when it’s on the wall, even when looking from the side.